
How often do you create a backup of your system (Complete Windows Installation with Apps and Files)? Here I am going to discuss how and why to create system image using the System Image Backup utility.
It is a good practice to create system image to avoid data losses. System Image backup is the complete backup of your Windows 10 computer with all apps, settings, and the files.
If your system is having issues or crashes frequently then you can recover your system from a System Image. It is a clone of the Windows installation drive. In simple language, it is a copy of C drive including Windows files, personal files, installed apps and programs.
There are many ways to secure a computer from viruses and crashes and it is one of them. System image recovery makes your system same as it was when the backup was taken. Let is learn more about how to create system image to protect our data.
What is System Image Backup
The System Image Backup is more than an ordinary Backup of your PC. It makes a clone of your current system state for recovering your computer to the current state in future. It also copies the updates and skips duplicate files.
We face a problem when a new software is installed with errors making the whole system slow or even crash in some cases. There can be a device failure, then it comes in use to get your Windows and app with their activation back.
The feature to create system image was removed in Windows 8 but now it’s back in Windows 10.
How to Create System Image in Windows 10
-
Open Control Panel
-
Click “Backup and Restore (Windows 7)” option under System and Security
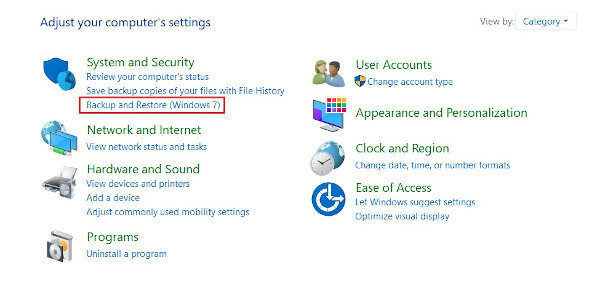
This will take you to the ‘Back up or restore your files’ menu.
-
Click the Create System Image option in the top-left corner of the screen.
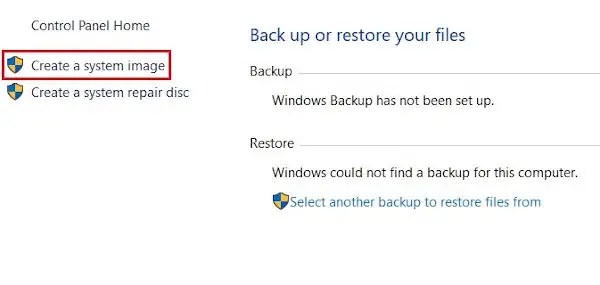
This will launch “Create System Image” wizard. It will scan for all connected drives.
-
In the backup wizard, you will be prompted to choose where to create system image from one of the three options to save the backup.
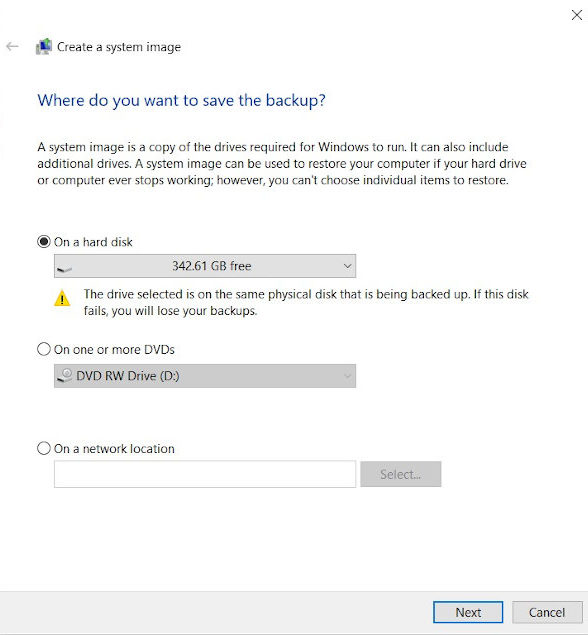
i) On a hard disk: It allows to use an external storage drive for storing backups. It should have free space equal to or more than the C drive size.
ii) On one or more DVDs: It allows to use a blank DVD for storing backups.
iii) On a network location: It allows to store backups on a network location, if available. -
Click Next
-
Confirm and begin the process by clicking Start Backup
This process will take anywhere from 10 minutes to 2 hours depending upon the amount of data that needs to be backed up.
Note: You can restore a Windows system image backup on a different PC having the same number of disks. Your Windows 10 installation will remain activated on new hardware also. You can simply use it for restoring a computer to its previous state.
But you can extract individual files on another computer by mounting the standard VHD (Virtual Hard Disk) image created on the backup drive. For this, connect the external drive to another computer and mount the ‘.vdi’ file and copy files from it using File Explorer.
And yes, during the process, you can use your computer as you would normally do. No need to stop your work. After the System Image Backup utility completes the task, remember to keep the hard drive in a safe place, so you can find it when you need it.
You have done a great thing for your Windows 10 PC. Now continue reading to know how you can use it to restore your computer in future.
How to Recover from System Image Backup
Once you create system image, the need may arise to recover from the system image backup. There are many ways in which you can use System Image recovery to re-image your computer. If your system is able to boot them use the first method.
System Image Recovery from Settings
- While on desktop press ‘Windows key + I’ shortcut to open Settings. You can also open settings from Start menu.
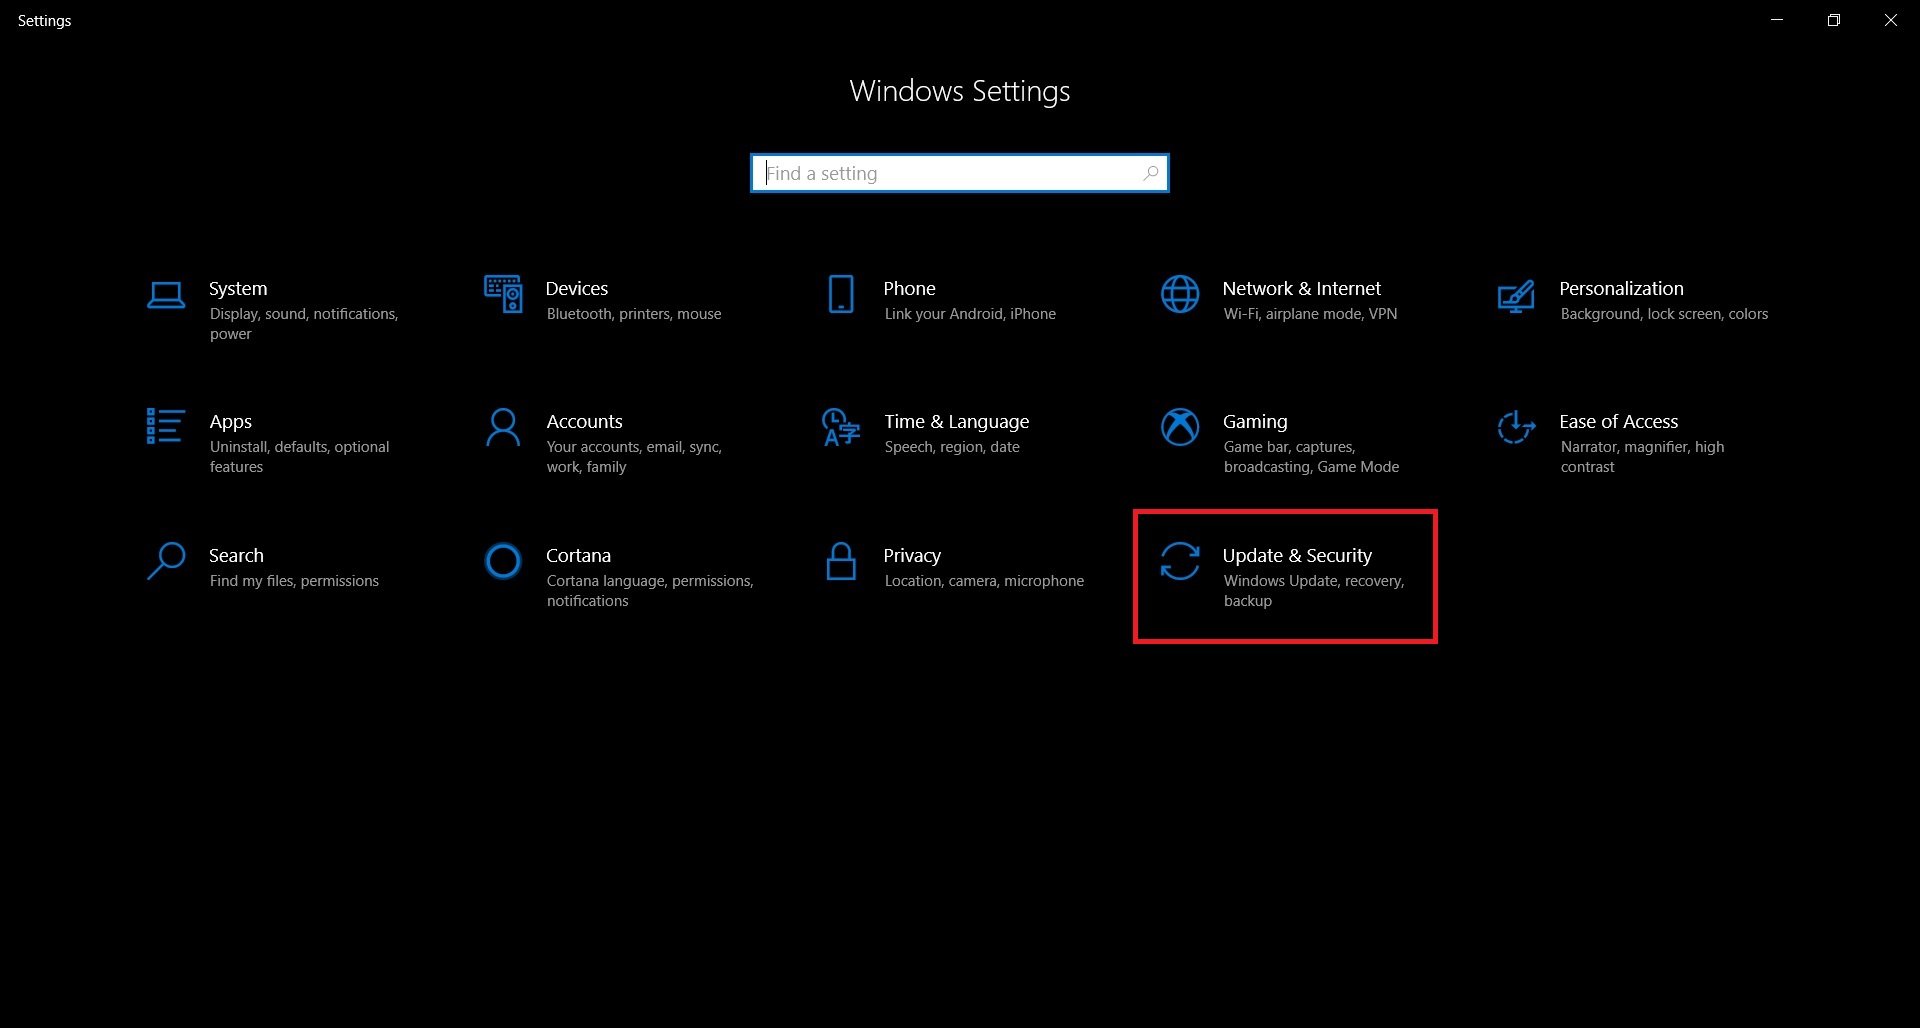
- In settings click or tap on Update & Security and select Recovery from the left pane.
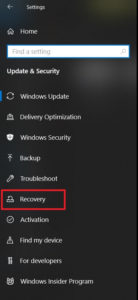
- In the right pane click on Restart now button under Advanced startup.

- Your PC will restart and open in recovery mode and a Choose an option screen will appear.
- Select Troubleshoot and then Advanced Options
- Finally, select System Image Recovery. It will open re-image system utility. Here, select the System image you created earlier and click Next to complete the recovery.
Note: It can take a long time to complete this process depending upon the size of the backup file.
How to Restore from a System Image Backup With a Recovery Drive
If you have created a recovery media then you can connect the recovery drive (USB) into your computer and restart. Your computer should boot from the recovery media automatically.
When your computer boot from the recovery media, select your keyboard layout to continue. You can select a language of your choice. For more options click See more keyboard layouts.
You will see Choose an option screen.
Then select Troubleshoot and then select Advanced options and finally System Image Recovery. And follow the instructions on the screen.
How to use System Image Recovery using a Windows Installation Media
This method is to be used in case of system failure or boot problem.
- To restore computer from the backup, connect the drive with the system image backup and reboot the computer with the Windows 10 Installation Media.
- During the Windows Setup, click Next, then click the Repair your computer link in the bottom-left corner of the screen.
- Click on Troubleshoot, Then Advanced options, and select System Image Recovery.
- Now select targeted operating system you want to recover, click Next and Finish.
Conclusion
We have learnt how to create system image and restore them using various methods. It is always advised to create system image and backup of your device to protect the data from any untoward incidents.
If you have any questions or thoughts regarding the topic, feel free to leave a comment. We will get back to you as soon as possible.
MORE FROM INKCUE
READ MORE
- Backup and Restore (Wikipedia)
